Database Relationships
When the Structure view is selected in the toolbar, and a database is selected in the primary sidebar, the Database Structure view is displayed, and by default displays the “Relationships” view.

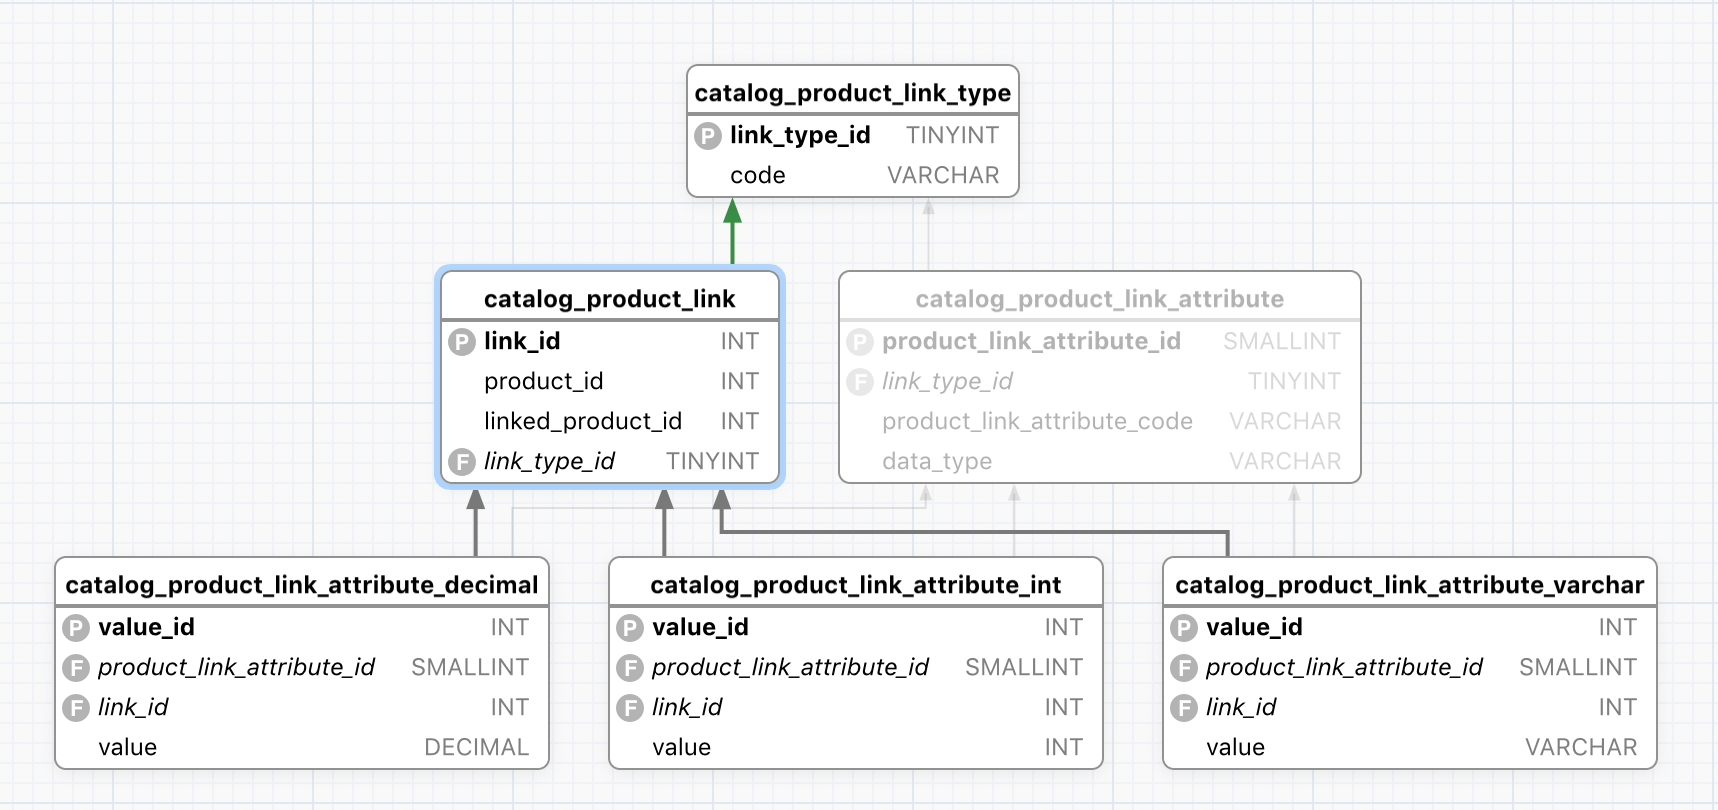
The Database Relationships view displays all of the tables in the database in a graph representation where each table is a node, connected by edges representing foreign keys.
MySQL currently only supports foreign keys in InnoDB tables, so the foreign key edges will only be displayed for InnoDB tables that have explicity-created foreign keys.
Because Querious utilizes foreign keys to provide some very helpful features, it’s would be beneficial to have the same features on MyISAM tables as well. To this end, Querious allows the creation of Artificial Foreign Keys on tables. These AFKs exist solely inside Querious and are not representative of any MySQL feature.

Relationships
- Primary Keys and Foreign Keys are shown with the (P) and (F) icon indicators.
- A relationship between tables is shown with an arrow pointing from the table with a foreign key to the table with the primary key.

Artifical Foreign Keys
For old MyISAM tables which don’t support foreign keys, an artificial foreign key is created in the Database Relationships view and is intended to mimic a real foreign key with the exception of providing any real constraints in the database (such as integrity checks and delete cascading behavior, etc). The sole purpose is to document the relationships between tables and allow Querious to provide naviational features based on those relationships.
To create an Artifical Foreign Key:
- Select the table you want to add the AFK to in the Tables list or click on it in the graph.
- In the right sidebar, click on the add button and select “New Artificial Foreign Key” from the menu.
- Enter a unique name for the key.
- Choose which parent table the artificial foreign key will reference.
- Map the appropriate columns in the child table to the columns in the parent table.
- Click “Save”
