Importing
Querious can import databases and table content from CSV, Tab, and SQL. The settings for CSV and Tab importing can be tweaked to meet special requirements to enhance compatability with other programs.
To import data, select the File ➞ Import… menu item. After selecting the file to import, another sheet will be displayed, and at the top are the file formats available to be imported from. Select the format appropriate for the given file.
Importing/Executing SQL
When importing from an SQL file, Querious essentially just executes the SQL statements found in the file. This means that if you simply need to export any file containy any SQL number of statements, you can use the “Import” process to do it.

Importing CSV, Tab
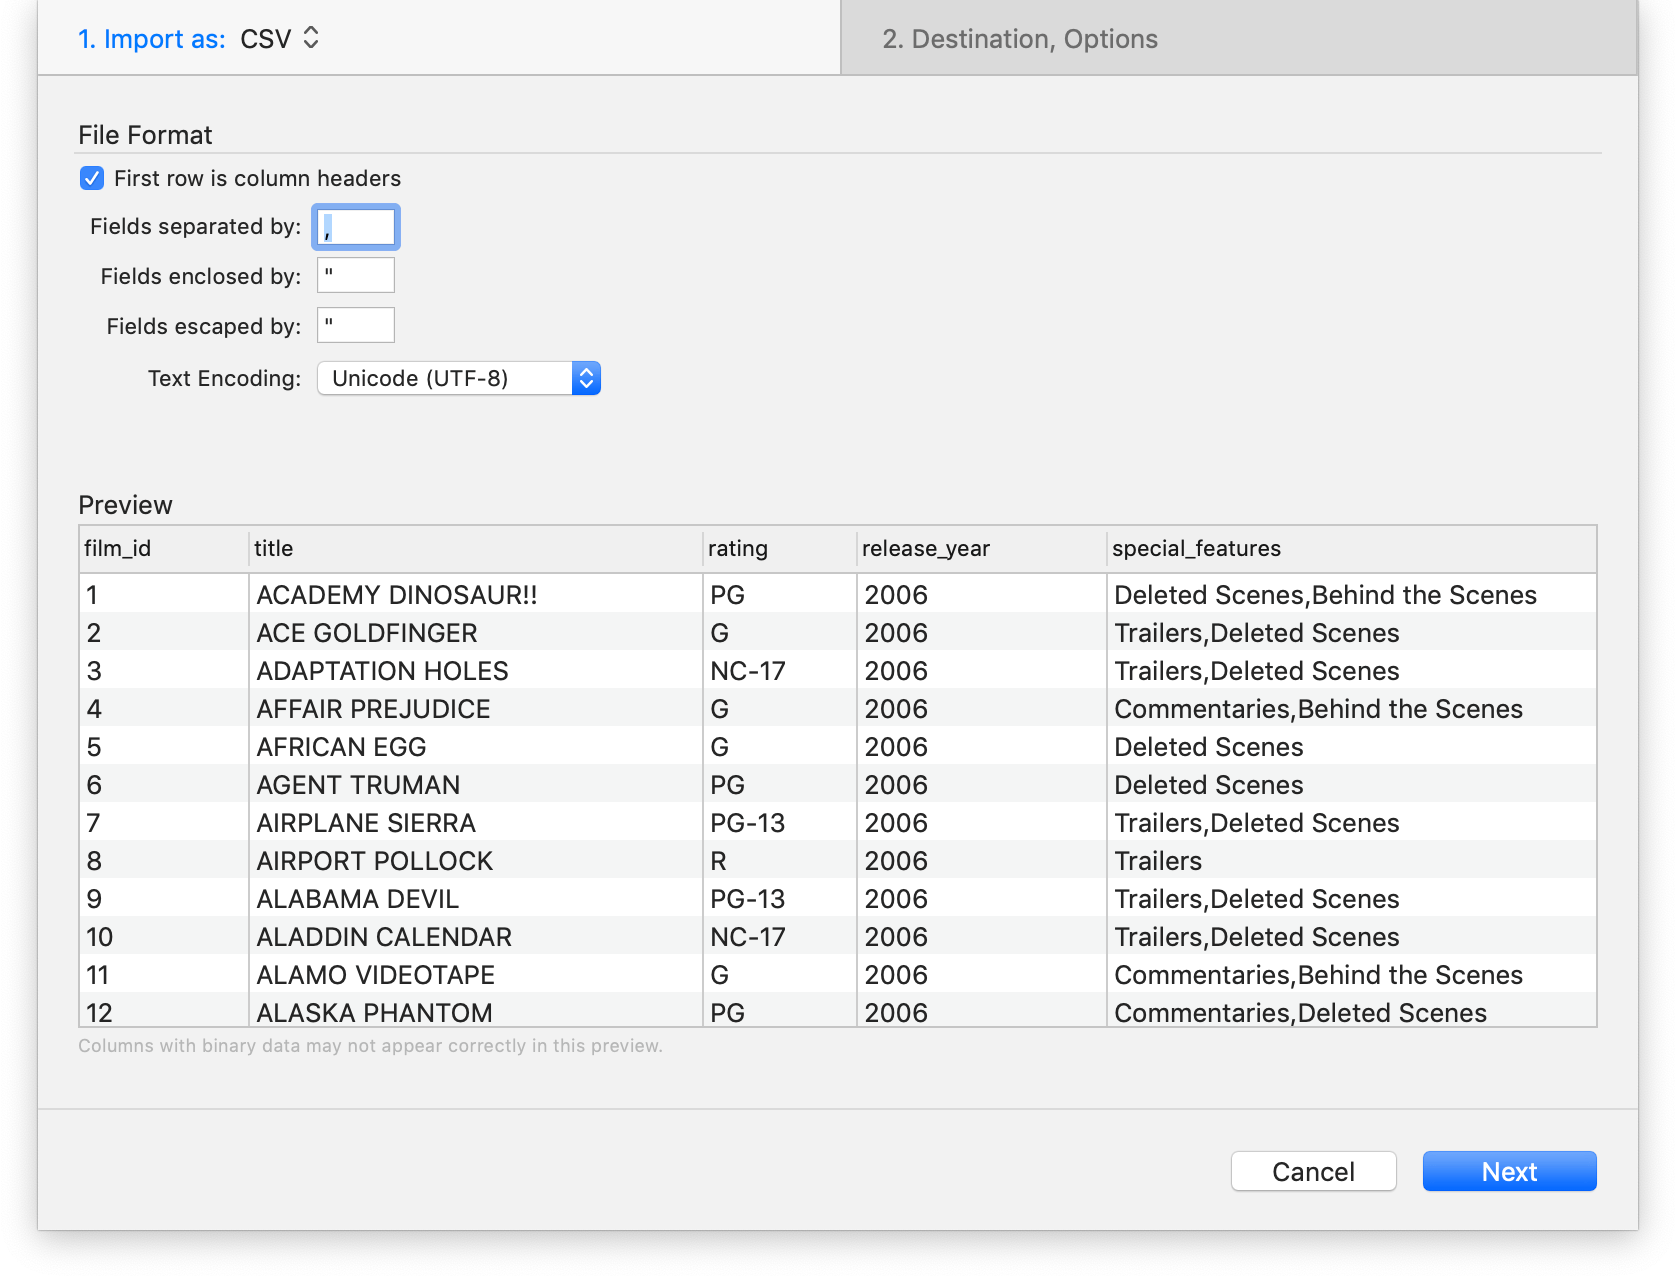
When importing table content from a CSV or Tab file, you need to specify the file format in detail as different programs can create these files differently. A preview is displayed at the bottom of the sheet to help you determine if the format settings are correct.

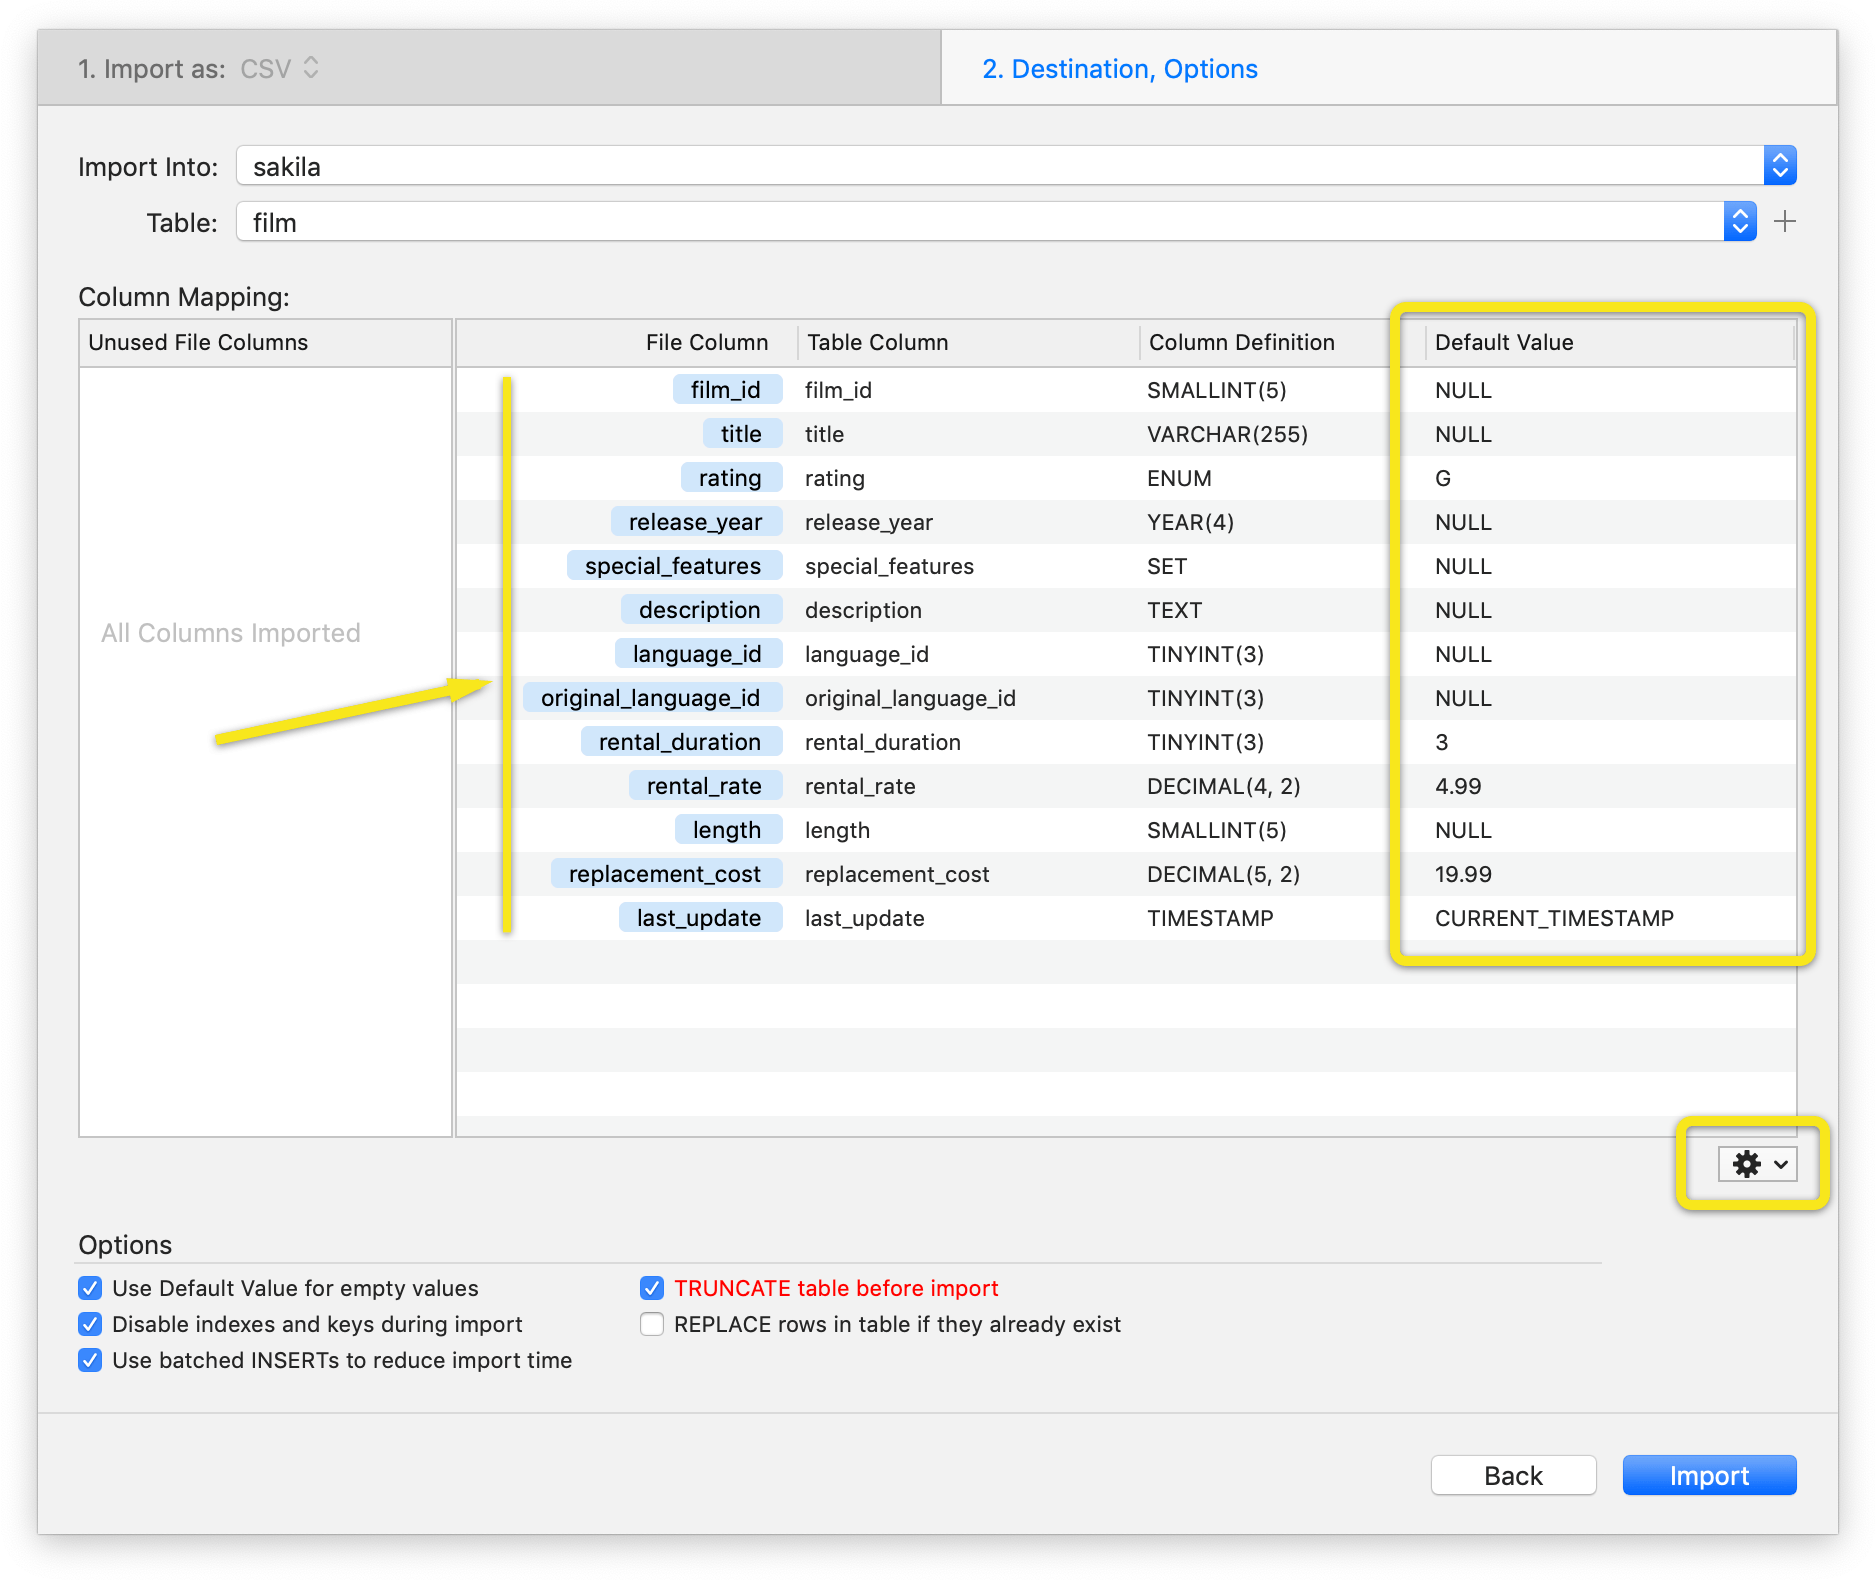
After specifying the format settings and click on the “Next” button, you then need to explicitly map the columns in the file to the columns in the destination table. In Querious, this is done with a simple drag-and-drop interface.

If the file does not have column headers, Querious will list columns by number and also display the first few characters of the field values of the first row for you to differentiate them by.
To map the columns in the file to the columns in the destination table, simply select and drag the columns you want to import next to the table columns in the “Columns to Import” list. You can selectively import any number of columns. You can select multiple columns at a time by holding the shift key or command key as you would a list of files in Finder. Clicking a column and then pressing Command-A will do a select all. Columns are initially automapped based on their name.
Importing into an Existing Table
- Select the database and table from the popups.
- Map the column names from the file into the table.
- For rows in the file with a blank value, the Default Value is used as the value imported into the table. These default values come from the table’s own specified default values. You may change these, including setting them all to
NULLusing the action menu below.
Importing into a New Table
- Select the destination database from the database popup.
- Select
New Tablefrom the table popup. - Enter the new table’s name, and optionally specify the table engine and collation.
- Each column in the file is automatically added as a column in the new table. These columns can be added to, removed, and renamed.
- Specify the type and length in Column Definition for each column if the default does not suit the data.
- For rows in the file with a blank value, the Default Value is used as the value imported into the table. You may change these, including setting them all to
NULLusing the action menu below.

